
By a Food Lover, For Food Lovers | Reading Time: 5 minutes
There is a specific kind of magic that happens in a warm kitchen late in the summer. It starts with a heavybottomed pot, a wooden spoon, and a mountain of plump, glossy blackberries. If you’ve ever gone foraging, you know the tax: fingers stained a deep purple and a few unavoidable thorn scratches.
But even if your “foraging” happened at the local farmer’s market or the grocery store produce aisle, turning those berries into
a jar of vibrant, jewel-toned jam is one of the most deeply satisfying weekend projects you can undertake.
Forget the store-bought stuff that tastes mostly of high-fructose corn syrup.
Beyond the Jar: The Foolproof Guide to Rich Shiny Homemade Blackberry Jam
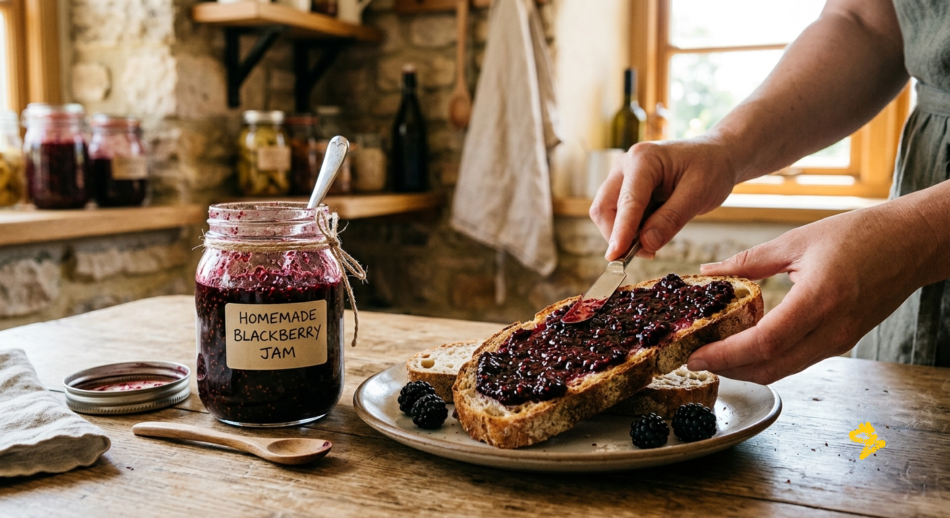
True homemade blackberry jam
should taste intensely of the fruit itself deep, slightly tart, beautifully sweet, and thick enough to hold its own
on a warm piece of sourdough toast. Today, we are stripping away the intimidation of canning and making a
classic, foolproof jam that captures summer in a jar.
The Simple Alchemy: What You Need
Great jam doesn’t require a laboratory of preservatives. In fact, the fewer ingredients you use, the more the
natural flavor of the blackberries shines through. Here is your shopping list:
Blackberries (4 cups / approx. 1 lb): Fresh is fantastic, but frozen works beautifully too! If using frozen, let them
thaw slightly so they release their juices.
Granulated Sugar (2 to 3 cups, adjusted to taste): Sugar isn’t just a sweetener here; it acts as the preservative
and works with the fruit’s natural structure to create the perfect “set.”
Fresh Lemon Juice (2 tablespoons): Do not skip this! Blackberries are naturally a bit low in acid. Lemon juice
provides the necessary chemical kick to wake up the natural pectin and balances the sweetness.
Optional: Pectin (1 box/packet): If your recipe calls for it, it guarantees a quick, firm set. If you prefer the oldschool method, you can skip it and let the jam reduce naturally—just expect a slightly softer, more rustic spread.
Step-by-Step: From Berry to Bread
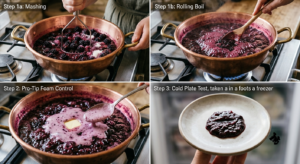
Step 1: The Mashing and Mixing
Grab a potato masher (or even a sturdy fork)
and gently crush the berries. You want to break them down enough to release their brilliant purple juices, but
leave plenty of chunks for that incredible, rustic texture. Stir in your sugar until the berries are completely coated.
Step 2: The Rolling Boil
Turn the heat up to medium-high and bring the mixture to a boil, stirring constantly so the sugar doesn’t
scorch on the bottom of the pot. Once it hits a “rolling boil”—a vigorous bubble that doesn’t stop even when
you stir—keep it going.
If you are using store-bought pectin, add it now according to its specific package
timing (usually 1 to 2 minutes of hard boiling).
Pro-Tip from the Kitchen: As the jam boils, a bit of foam might rise to the top. Don’t panic! It’s completely
harmless. You can skim it off with a spoon at the end, or stir in a tiny half-teaspoon of butter during the boil to
keep the foaming to an absolute minimum
Step 3: Testing the “Set”
If you aren’t using added pectin, how do you know when the jam is done? Use the Cold Plate Test. Before you
start cooking, pop a couple of small ceramic saucers into the freezer.
When the jam has been bubbling and
thickening for about 10-15 minutes, spoon a small dollop onto one of the ice-cold plates. Let it sit for a minute,
then gently push it with your finger.
If it wrinkles and holds its shape, your jam is ready! If it’s still runny, give it another 2-3 minutes of boiling and
try again.
The Finishing Touch: Jarring and Storage
Carefully ladle your hot jam into clean, sterilized glass jars, leaving about a quarter-inch of space at the top.
Wipe the rims completely clean with a damp paper towel any stray drop of jam on the rim can prevent a
proper seal.
Screw the lids on until they are fingertip tight. If you plan on eating this over the next few weeks, you can let
the jars cool to room temperature and pop them straight into the fridge. For long-term pantry storage,
process the jars in a boiling water bath for 10 minutes.
Conclusion: Taste the Fruits of Your Labor
There is nothing quite like the sound of a sealing jar lid popping on the kitchen counter—it’s the ultimate
sound of culinary success. Once your jam has cooled and set, twist open a jar. Slather it over a warm, buttery
biscuit, swirl it into morning oatmeal, or pair it with sharp cheese on a charcuterie board. You made this. And
it tastes a million times better because of it.